Multi-node Installation
For users wanting to build a scaled out and high available production environment, ths recommended way is to install 2 ZStack management nodes, MySQL, and RabbitMQ on separate machines:

For machine to install ZStack management node, we recommend below hardware specification:
| CPU | >= 4 Cores Intel/AMD CPUs supporting VT-x or SVM |
| Memory |
>= 8G |
| Free Disk |
>= 250G |
| OS |
ZStack OS |
For machines to install MySQL and RabbitMQ message broker, please refer to their official web sites.
Low disk capacity can cause RabbitMQ hang
Please make sure your RabbitMQ machine has enough memory and free disk. When encountering low memory or disk capacity, RabbitMQ will enter flow control mode which will throttle message delivery and lead to slow or paused ZStack management node.1. Install ZStack Management Node 1
The Introduction of ZStack OS
- ZStack OS is customized from CentOS 7.2, including required system libs, with friendly Terminal UI (TUI) and well tested by hundreds of cloud users.
- ZStack OS ISO includes all ZStack required components. So installing ZStack OS does not need Internet connection.
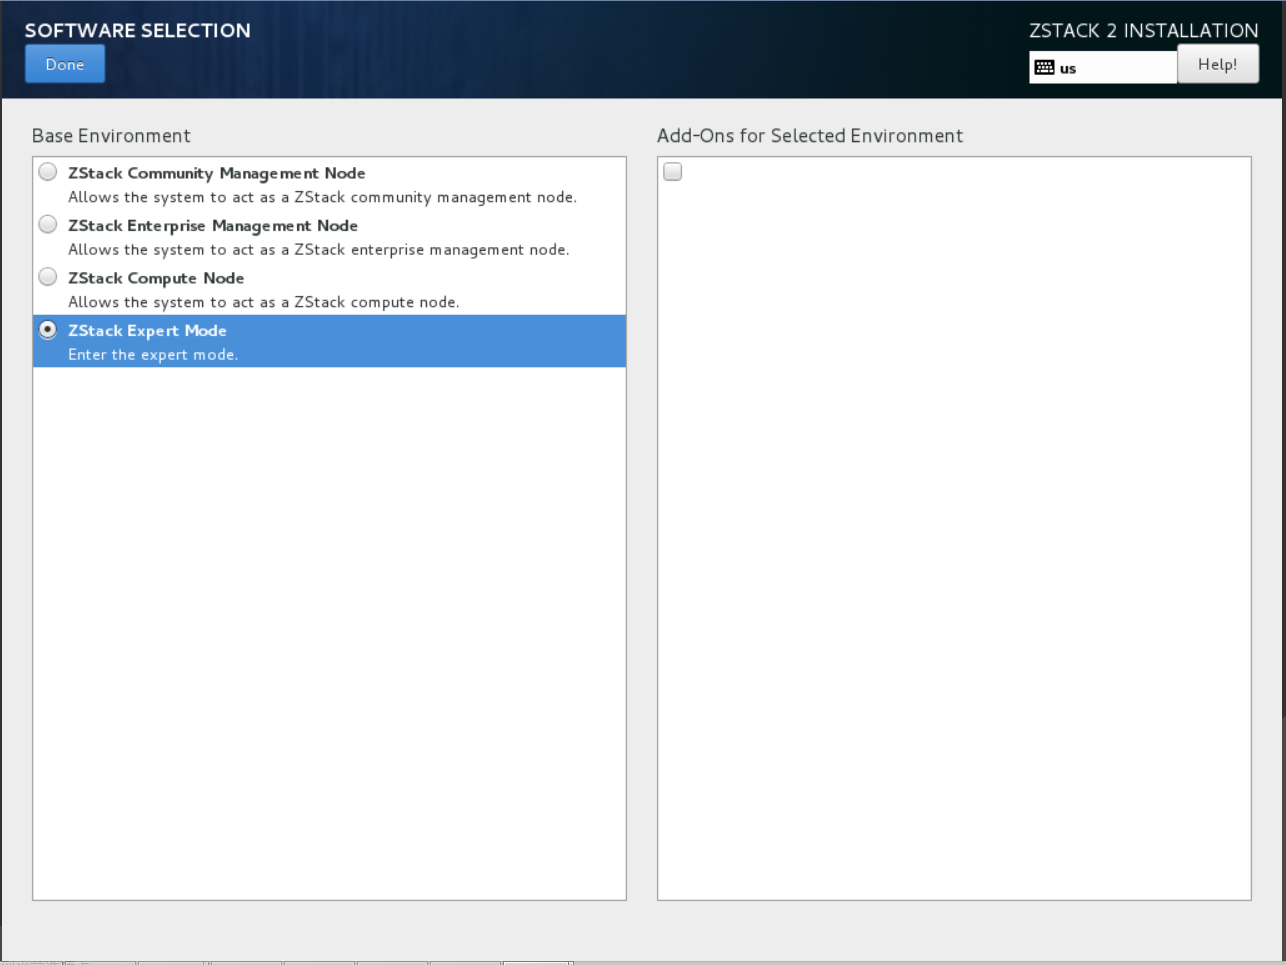
- Provide four installation modes: Enterprise management node mode, community management node mode, computing node mode, expert mode.
The Introduction of Four Installation Modes:
| ZStack Enterprise management node | Install ZStack OS and ZStack Enterprise Management Node, which includes full Enterprise features (like VM HA, QoS, VM password resetting ...) with 1 free computing node license. |
| ZStack Community Management Node | Install ZStack OS and ZStack Community Management Node, which could add unlimited computing nodes. |
| ZStack Computing Node | Install ZStack OS and the computing node essential packages. |
| ZStack Expert Node | Install ZStack OS and config the local yum. This is for advanced usage, e.g. installing multiple ZStack Management Nodes. |
Install ZStack Management Node
Download ZStack iso
ZStack user should download the ZStack OS ZStack-x86_64-DVD-2.0.2.iso and ZStack-installer package ZStack-installer-2.0.2.bin.Download link :
- ZStack ISO:http://cdn.zstack.io/community/downloads/iso/ZStack-x86_64-DVD-2.0.2.iso
- ZStack-installer package:http://cdn.zstack.io/community/downloads/zstack/2.0/ZStack-installer-2.0.2.bin
The md5sum of ZStack-installer package is:b9ce198420cc398504d8a4de4caf5709
System Installation
The system has been pre-configured default options: DATE & TIME for the East Asia Area, LANGUAGE is English, KEYBOARD is English (US). The administrator can change the configuration.
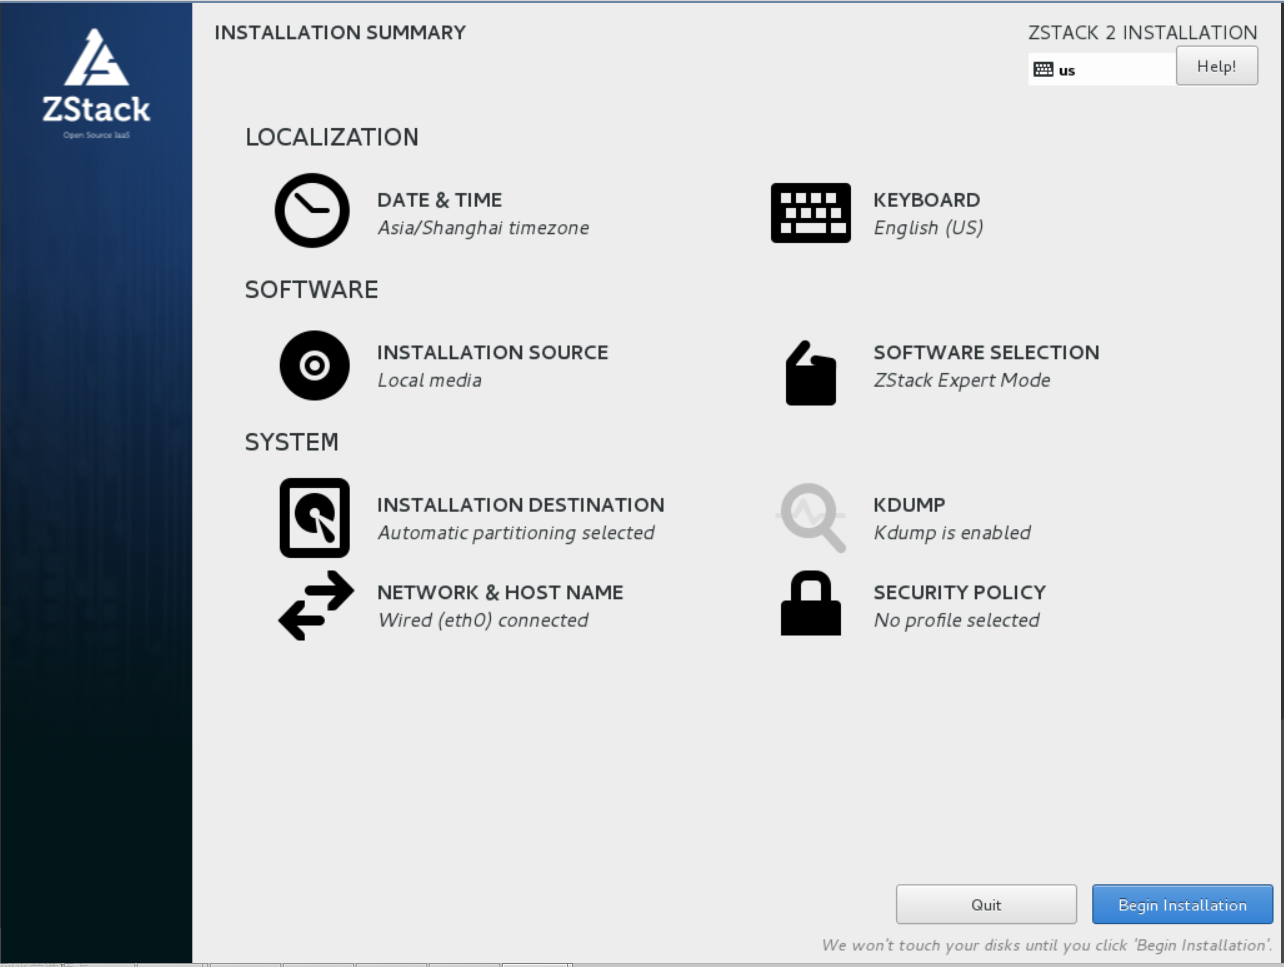
Mode selection
If you want to use multi-node Installation, please choose ZStack Expert Mode.
Depending on the hardware performance, the process may take 5 ~ 15 minutes.
Use wget:
After ZStack OS expert mode is installed, please login System and do:

wget http://cdn.zstack.io/community/downloads/zstack/2.0/ZStack-installer-2.0.2.bin

bash ZStack-installer-2.0.2.bin -i
Install ZStack with -i parameter
Mysql and RabbitMQ aren't installed, and only the management node is installed, after adding the -i parameter.Once you successfully installed the node, configure the IP into zstack.properties:
zstack-ctl configure management.server.ip=ip_of_management_node1

Example: zstack-ctl configure management.server.ip=10.89.13.57

zstack-ctl save_config
2. Install MySQL
You can use ZStack control tool zstack-ctl, which is automatically installed along with ZStack in step 1. To install
MySQL.
sudo zstack-ctl install_db --host=ip_of_machine_to_install_mysql

Example: sudo zstack-ctl install_db --host=192.168.0.225
zstack-ctl leverages Ansible to do the installation; it will ask you for SSH root password
if the SSH key is not set on the remote machine.
3. Install RabbitMQ
As step 2, you can use zstack-ctl to install RabbitMQ too:
sudo zstack-ctl install_rabbitmq --host=ip_of_machine_to_install_rabbitmq

Example: sudo zstack-ctl install_rabbitmq --host=192.168.0.225
Once you successfully installed RabbitMQ, you need to create credentials for remote access:
rabbitmqctl add_user username password

Example: rabbitmqctl add_user zstack zstack123

rabbitmqctl set_user_tags username administrator

Example: rabbitmqctl set_user_tags zstack administrator

rabbitmqctl change_password username password

Example: rabbitmqctl change_password zstack zstack123

rabbitmqctl set_permissions -p / username ".*" ".*" ".*"

Example: rabbitmqctl set_permissions -p / zstack ".*" ".*" ".*"
Now you need to configure above RabbitMQ credentials to zstack.properties:
zstack-ctl configure CloudBus.rabbitmqUsername=rabbitmq_username

Example: zstack-ctl configure CloudBus.rabbitmqUsername=zstack

zstack-ctl configure CloudBus.rabbitmqPassword=rabbitmq_password

Example: zstack-ctl configure CloudBus.rabbitmqPassword=zstack123

zstack-ctl save_config
4. Install ZStack Management Node 2
On the management node 1, you can use zstack-ctl to install extra management nodes:
sudo zstack-ctl install_management_node --host=ip_of_machine_to_install_node_2

Example: sudo zstack-ctl install_management_node --host=192.168.0.225
Once you successfully installed the node, configure the IP into zstack.properties:
zstack-ctl configure management.server.ip=ip_of_management_node2

Example: zstack-ctl configure management.server.ip=10.89.13.57

zstack-ctl save_config
you can repeat this step to install more nodes if needed.
5. Install Web UI
On the management node 1, you can use zstack-ctl to install web UI:
5.1 Install to local
sudo zstack-ctl install_ui
5.2 Install to separate machine
sudo zstack-ctl install_ui --host=ip_of_machine_to_install_ui

Example: sudo zstack-ctl install_ui --host=192.168.0.225
Default Credential
The default credential for UI login is admin/password.Now your multi-node ZStack environment is successfully installed, visit Getting Started With Multi-node Installation see how to configure and run ZStack.