Elastic Port Forwarding
1. Overview
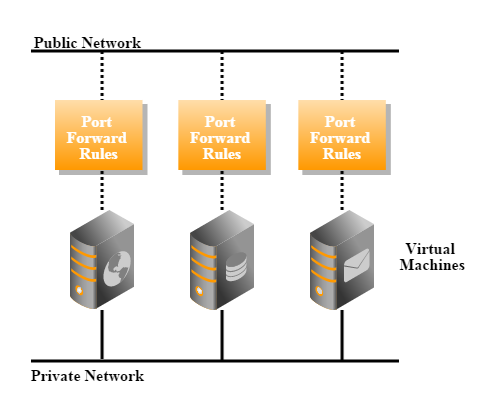
While EIP can be used to bind a public IP to a VM that is on a private network, it opens all ports of that EIP to the world; to achieve decent security, users may need to use security group along with EIP. Elastic port forwarding provides another way to this problem; users can selectively bind one or several ports of an public IP to a VM on the private network, and restrict what traffic can access these ports.
In this example, we will initially create a port forwarding rule for one VM, and later rebind it to another VM.
2. Prerequisites
We assume you have followed Quick Installation Guide to install ZStack on a single Linux machine, and the ZStack management node is up and running. To use the command line tool, type below command in your shell terminal:
#zstack-cli

Connect to a remote management node
By default, zstack-cli connects to the ZStack management node on the local machine. To connect to a remote node, using option '-H ZSTACK_NODE_HOST_IP'; for example: zstack-cli -H 192.168.0.224To make things simple, we assume you have only one Linux machine with one network card that can access the internet; besides, there are some other requirements:
- At least 20G free disk that can be used as primary storage and backup storage
- Several free IPs that can access the internet
- NFS server is enabled on the machine (done in Quick Installation Guide)
- SSH credentials for user root (done in Quick Installation Guide)
Configure root user
The KVM host will need root user credentials of SSH, to allow Ansible to install necessary packages and to give the KVM agent full control of the host. As this tutorial use a single machine for both ZStack management node and KVM host, you will need to configure credentials for the root user.CentOS:
sudo su
passwd root
Based on those requirements, we assume below setup information (you should change the IP address and other configurations to align with your local environment.):
- ethernet device names: eth0
- eth0 IP: 172.20.11.34
- free IP range: 10.0.101.100 ~ 10.0.101.150 (these IPs can access the internet)
- primary storage folder: /zstack_ps
- backup storage folder: /zstack_bs
Slow VM stopping due to lack of ACPID:
Though we don't show the example of stopping VM, you may find stopping a VM takes more than 60s. That's because the VM image doesn't support ACPID that receives KVM's shutdown event, ZStack has to wait for 60 seconds timeout then destroy it. It's not a problem for regular Linux distributions which have ACPID installed.3. LogIn
open zstack-cli and login with admin/password:
>>> LogInByAccount accountName=admin password=password

4. Create Zone
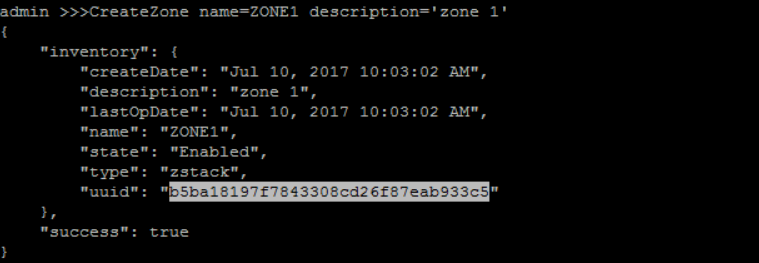
create a zone with name 'ZONE1' and description 'zone 1':
>>> CreateZone name=ZONE1 description='zone 1'
Substitute your UUIDs for those in this tutorial
Resources are all referred by UUIDs in CLI tutorials. The UUIDs are generated by ZStack when you create a resource, so they may vary from what you see in tutorials. UUIDs of resources will be printed out in a JSON object to the screen after resources are created; however, it's inconvenient to scroll up screen to find UUIDs of resources that are created very early. We add buttons to sections, which will show you commands of retrieving UUIDs of resources,
so please make sure you replace UUIDs in tutorials with yours.
5. Create Cluster
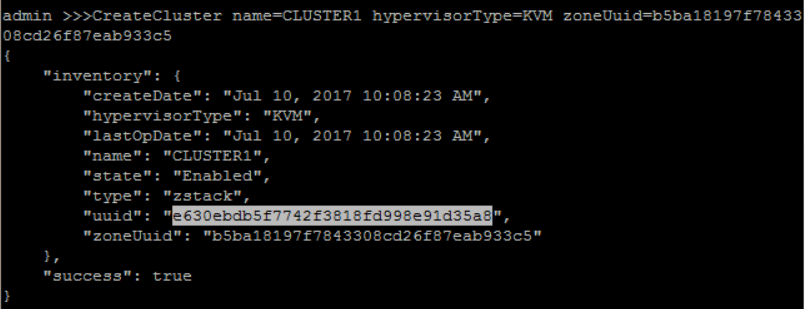
create a cluster with name 'CLUSTER1' and hypervisorType 'KVM' under zone 'ZONE1':
QueryZone fields=uuid, name=ZONE1>>> CreateCluster name=CLUSTER1 hypervisorType=KVM zoneUuid=b5ba18197f7843308cd26f87eab933c5
6. Create Host
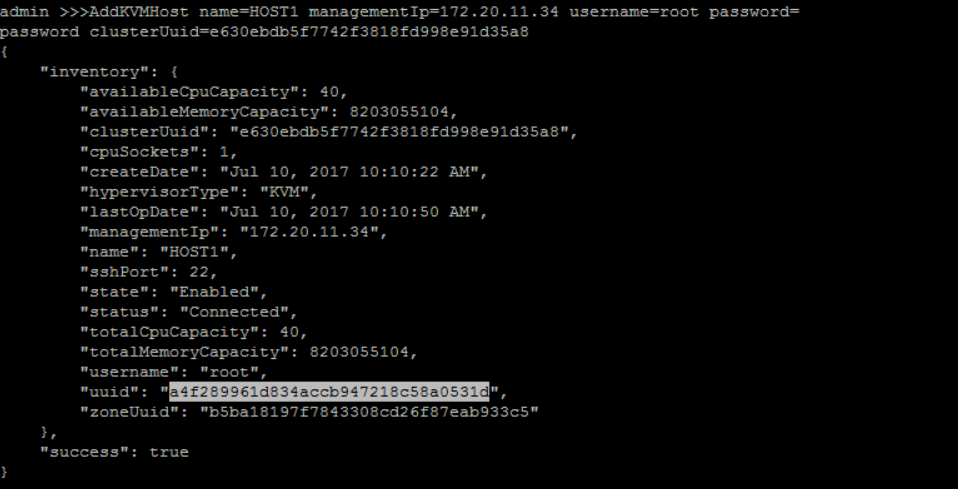
add KVM Host 'HOST1' under 'CLUSTER1' with correct host IP address and root username and password:
QueryCluster fields=uuid, name=CLUSTER1>>> AddKVMHost name=HOST1 managementIp=172.20.11.34 username=root password=password clusterUuid=e630ebdb5f7742f3818fd998e91d35a8
A little slow when first time adding a host
It may take a few minutes to add a host because Ansible will install all dependent packages, for example, KVM, on the host.7. Add Primary Storage
add Primary Storagei 'PRIMAYR-STORAGE1' with URI '/zstack_ps' under zone 'ZONE1':
QueryZone fields=uuid, name=ZONE1>>> AddLocalPrimaryStorage name=PRIMARY-STORAGE1 url=/zstack_ps zoneUuid=b5ba18197f7843308cd26f87eab933c5
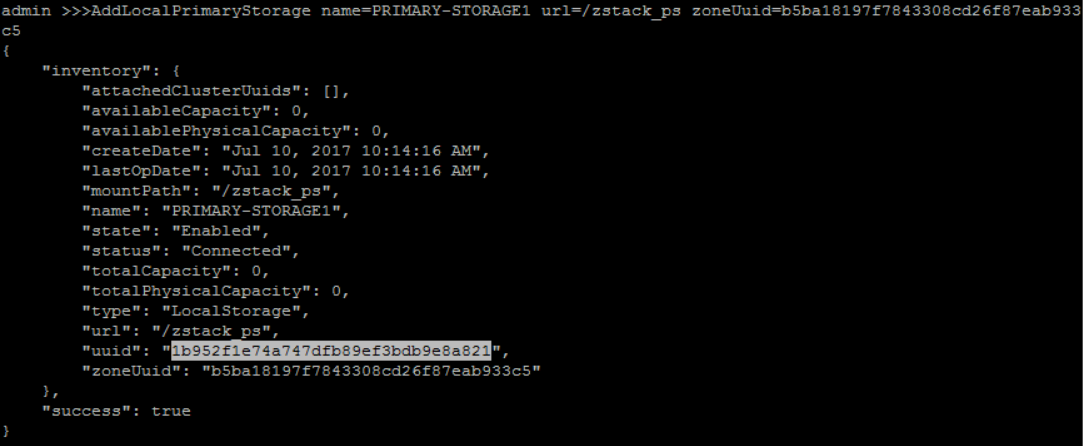
Format of URL
The format of URL is exactly the same to the one used by Linux mount command.8. Attach Primary Storage to Cluster
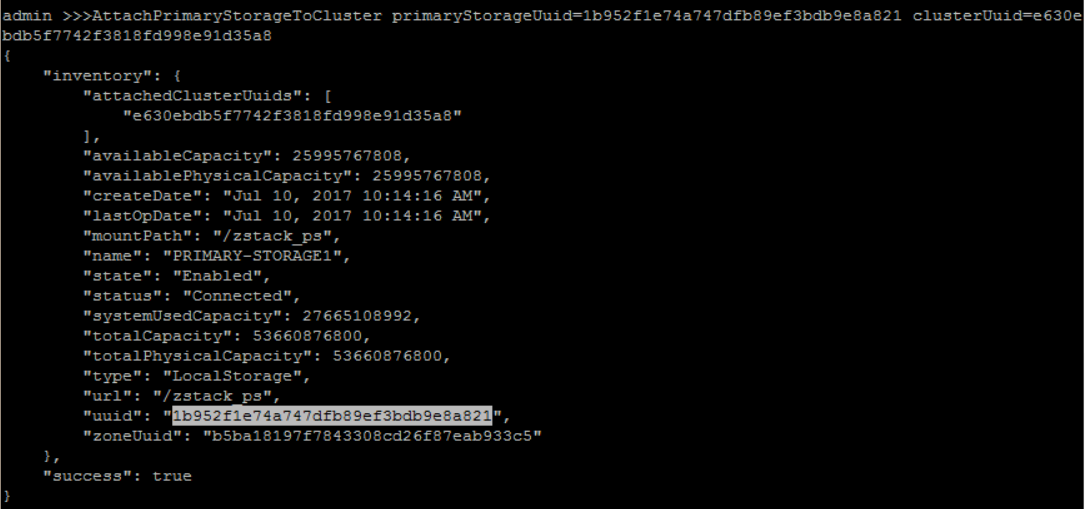
attach 'PRIMARY-STORAGE1' to 'CLUSTER1':
QueryCluster fields=uuid, name=CLUSTER1QueryPrimaryStorage fields=uuid, name=PRIMARY-STORAGE1>>> AttachPrimaryStorageToCluster primaryStorageUuid=1b952f1e74a747dfb89ef3bdb9e8a821 clusterUuid=e630ebdb5f7742f3818fd998e91d35a8
9. Add Backup Storage
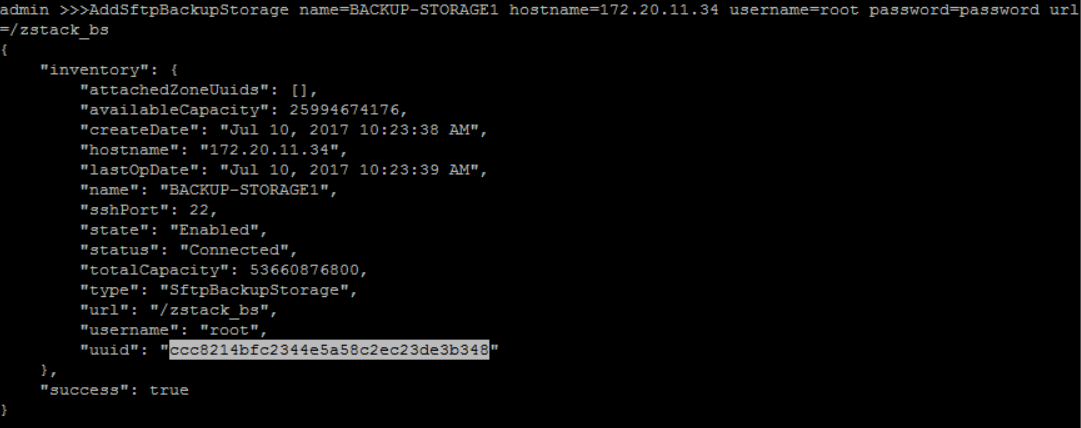
add sftp Backup Storage 'BACKUP-STORAGE1' with backup storage host IP address('172.20.11.34'), root username('root'), password('password') and sftp folder path('/home/sftpBackupStorage'):
>>> AddSftpBackupStorage name=BACKUP-STORAGE1 hostname=172.20.11.34 username=root password=password url=/zstack_bs
10. Attach Backup Storage
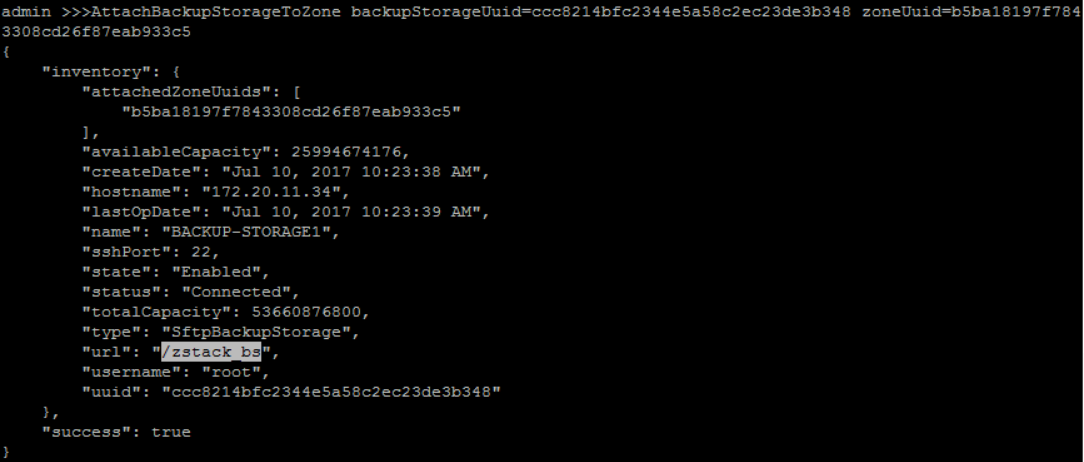
attach new created Backup Storage('BACKUP-STORAGE1') to zone('ZONE1'):
QueryZone fields=uuid, name=ZONE1QueryBackupStorage fields=uuid, name=BACKUP-STORAGE1>>> AttachBackupStorageToZone backupStorageUuid=ccc8214bfc2344e5a58c2ec23de3b348 zoneUuid=b5ba18197f7843308cd26f87eab933c5
11. Add Image
add Image('image') with format 'qcow2', 'RootVolumeTemplate' type, 'Linux' platform and image URL('http://cdn.zstack.io/product_downloads/images/zstack-image.qcow2') to backup storage ('BACKUP-STORAGE1'):
QueryBackupStorage fields=uuid, name=BACKUP-STORAGE1>>> AddImage name=image mediaType=RootVolumeTemplate platform=Linux url=http://192.168.200.100/mirror/diskimages/zstack-image-1.4.qcow2 backupStorageUuids=ccc8214bfc2344e5a58c2ec23de3b348 format=qcow2
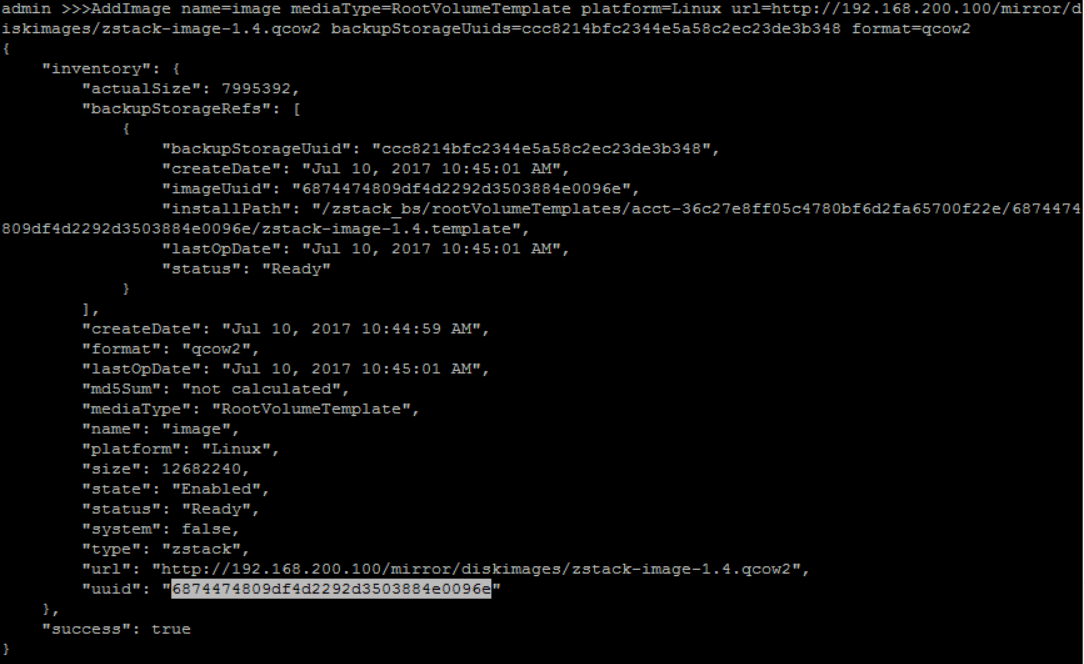
this image will be used as user VM image.
Add another Image('VRImage') with format 'qcow2' and image URL('http://cdn.zstack.io/product_downloads/images/zstack-image.qcow2') to backup storage ('BACKUP-STORAGE1'):
QueryBackupStorage fields=uuid, name=BACKUP-STORAGE1Fast link for users of Mainland China
.................................http://cdn.zstack.io/product_downloads/vrouter/zstack-vrouter-2.0.0.qcow2>>> AddImage name=VRImage url=http://192.168.200.100/mirror/diskimages/zstack-vrouter-latest.qcow2 backupStorageUuids=ccc8214bfc2344e5a58c2ec23de3b348 format=qcow2
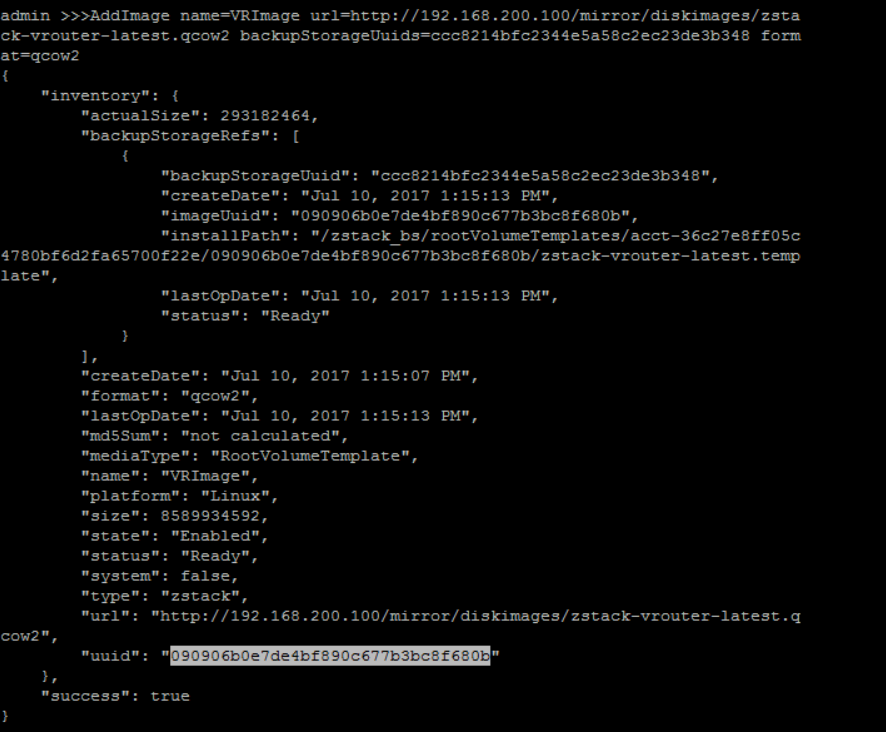
Cache images in your local HTTP server
The virtual router image is about 432M that takes a little of time to download. We suggest you use a local HTTP server to storage it and images created by yourself.12. Create L2 Network
create No Vlan L2 Network 'PUBLIC-MANAGEMENT-L2' with physical interface as 'eth1' under 'ZONE1':
QueryZone fields=uuid, name=ZONE1>>> CreateL2NoVlanNetwork name=PUBLIC-MANAGEMENT-L2 physicalInterface=eth0 zoneUuid=b5ba18197f7843308cd26f87eab933c5

attach 'PUBLIC-MANAGEMENT-L2' to 'CLUSTER1':
QueryCluster fields=uuid, name=CLUSTER1QueryL2Network fields=uuid, name=PUBLIC-MANAGEMENT-L2>>> AttachL2NetworkToCluster l2NetworkUuid=b4b611280afe4d289c8e3f66aee0393d clusterUuid=e630ebdb5f7742f3818fd998e91d35a8

create new private Vlan L2 network 'PRIVATE-L2' with physical interface as 'eth0' and vlan '100' under 'ZONE1':
QueryZone fields=uuid, name=ZONE1>>> CreateL2VlanNetwork name=PRIVATE-L2 physicalInterface=eth0 vlan=100 zoneUuid=b5ba18197f7843308cd26f87eab933c5

attach 'PRIVATE-L2' to 'CLUSTER1':
QueryCluster fields=uuid, name=CLUSTER1QueryL2Network fields=uuid, name=PRIVATE-L2>>> AttachL2NetworkToCluster l2NetworkUuid=b052b4e080c840f6984c29581b167644 clusterUuid=e630ebdb5f7742f3818fd998e91d35a8

13. Create L3 Network
on L2 'PUBLIC-MANAGEMENT-L2', create Public Management L3 'PUBLIC-MANAGEMENT-L3' and set system to 'True':
QueryL2Network fields=uuid, name=PUBLIC-MANAGEMENT-L2>>> CreateL3Network name=PUBLIC-MANAGEMENT-L3 l2NetworkUuid=b4b611280afe4d289c8e3f66aee0393d system=true

create IP Range for 'PUBLIC-MANAGEMENT-L3':
QueryL3Network fields=uuid, name=PUBLIC-MANAGEMENT-L3>>> AddIpRange name=PUBLIC-IP-RANGE l3NetworkUuid=5bda71a3ebbd48a5947e325dd24665e5 startIp=10.121.9.40 endIp=10.121.9.100 netmask=255.0.0.0 gateway=10.0.0.1

12. Create Virtual Router Offering
create a Virtual Router VM instance offering 'VR-OFFERING' with 1 CPU, 512MB memory, management L3 network 'PUBLIC-MANAGEMENT-L3', public L3 network 'PUBLIC-MANAGEMENT-L3' and isDefault 'True':
QueryImage fields=uuid, name=VIRTUAL-ROUTERQueryL3Network fields=uuid,name, name?=PUBLIC-MANAGEMENT-L3,PRIVATE-L3QueryZone fields=uuid, name=ZONE1>>> CreateVirtualRouterOffering name=VR-OFFERING cpuNum=1 imageUuid=090906b0e7de4bf890c677b3bc8f680b managementNetworkUuid=5bda71a3ebbd48a5947e325dd24665e5 publicNetworkUuid=5bda71a3ebbd48a5947e325dd24665e5 zoneUuid=b5ba18197f7843308cd26f87eab933c5 memorySize=536870912
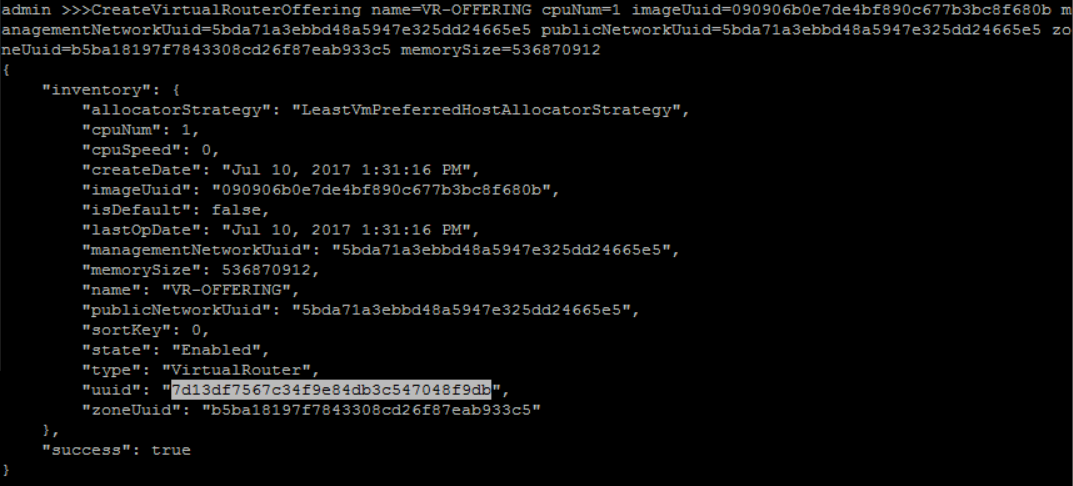
13. Create Private Network
on L2 network 'PRIVATE-L2', create a new guest VM L3 'PRIVATE-L3' with domain 'tutorials.zstack.org':
QueryL2Network fields=uuid, name=PRIVATE-L2>>> CreateL3Network name=PRIVATE-L3 l2NetworkUuid=b052b4e080c840f6984c29581b167644

create IP Range for 'PRIVATE-L3':
QueryL3Network fields=uuid, name=PRIVATE-L3>>> AddIpRange name=PRIVATE-RANGE l3NetworkUuid=6a73fdfffb104c79919179af28cba3e3 startIp=192.168.2.2 endIp=192.168.2.254 netmask=255.255.255.0 gateway=192.168.2.1

add DNS for 'PRIVATE-L3':
QueryL3Network fields=uuid name=PRIVATE-L3>>> AddDnsToL3Network l3NetworkUuid=6a73fdfffb104c79919179af28cba3e3 dns=8.8.8.8
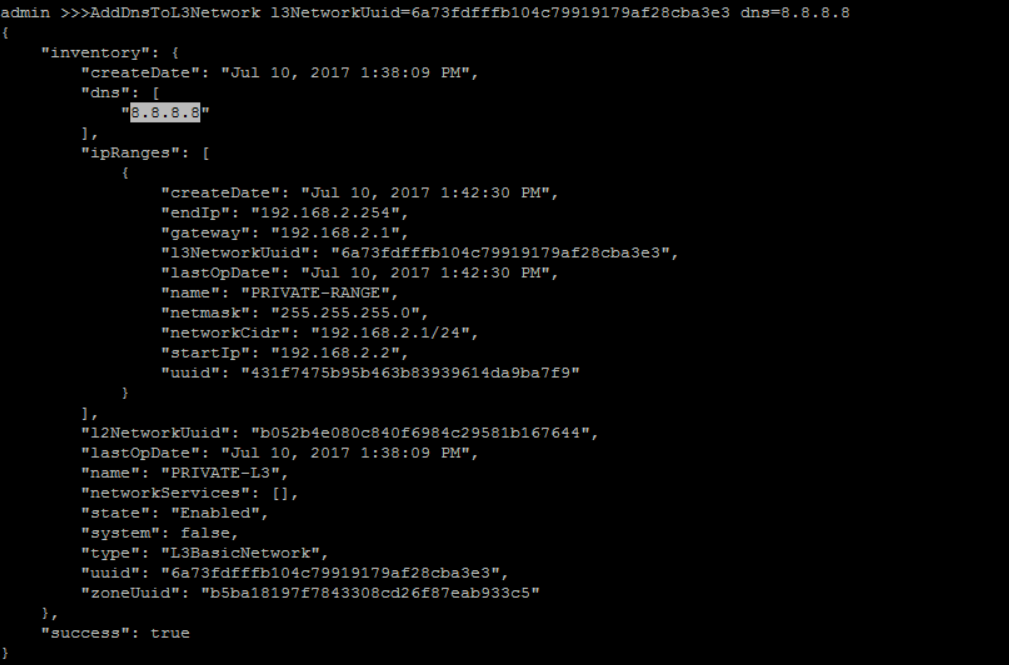
we need to get available network service provider UUID, before add any virtual router service to L3 network:
>>> QueryNetworkServiceProvider
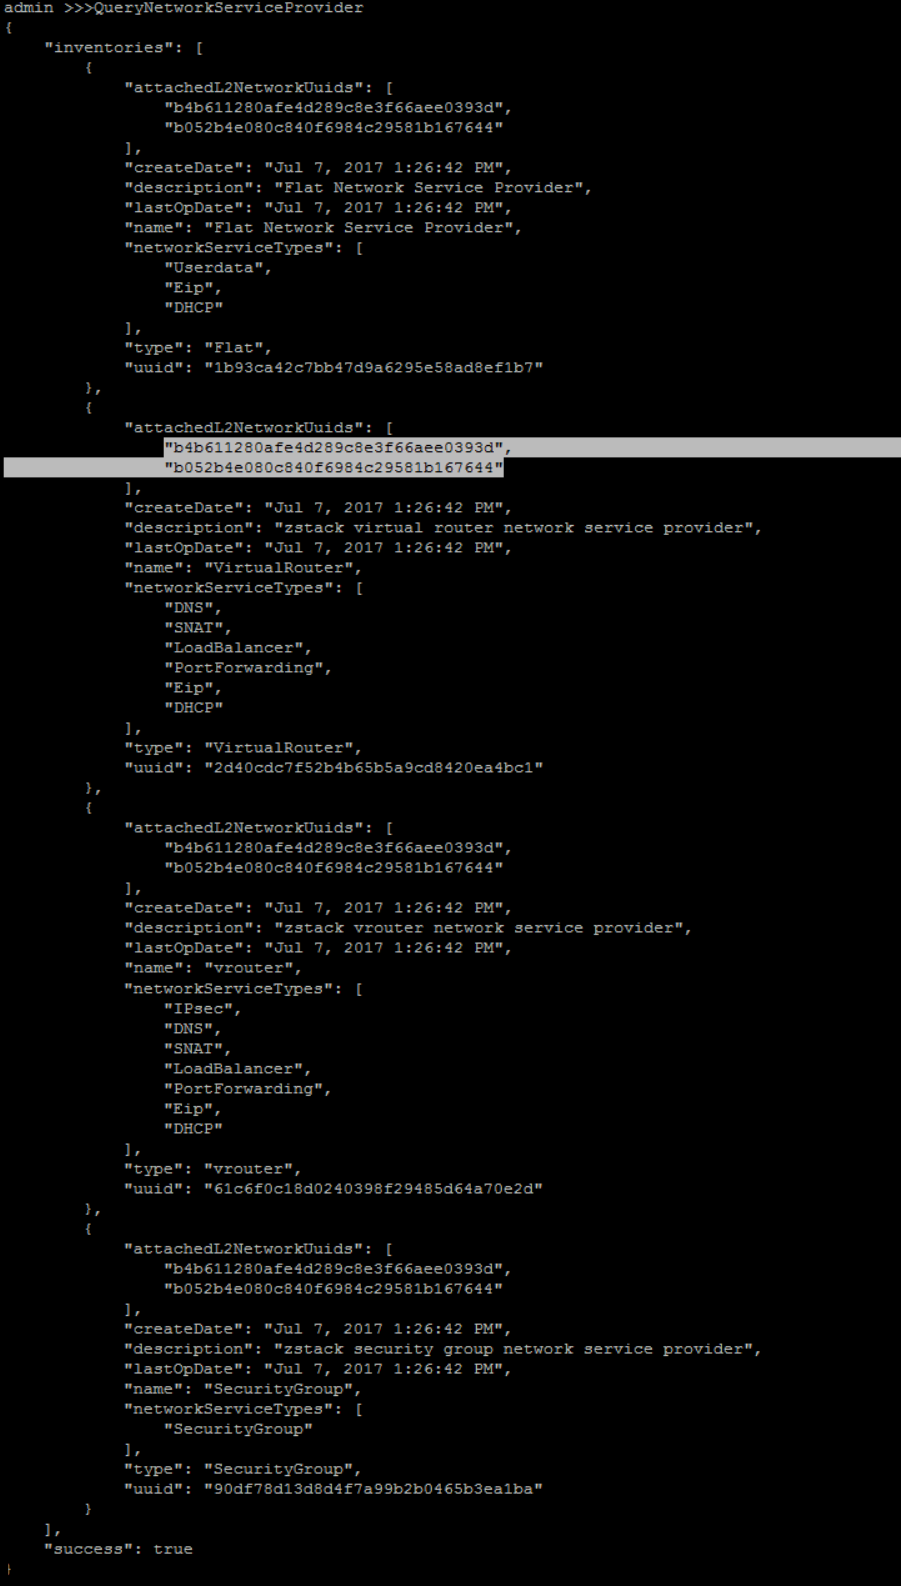
there are 2 available network service providers. In this tutorial, we just need the Virtual Router, which could provide 'DHCP', 'SNAT', 'DNS', 'PortForwarding' and 'Eip'.
attach VirtualRouter services 'DHCP', 'SNAT', 'DNS' and 'PortForwarding' to 'PRIVATE-L3':
QueryL3Network fields=uuid, name=PRIVATE-L3QueryNetworkServiceProvider fields=uuid, name=VirtualRouterStructure of parameter networkServices
It's a JSON object of map that key is UUID of network service provider and value is a list of network service types.>>> AttachNetworkServiceToL3Network networkServices="{'61c6f0c18d0240398f29485d64a70e2d':['IPsec','DNS','SNAT','LoadBalancer','PortForwarding','Eip','DHCP']}" l3NetworkUuid=6a73fdfffb104c79919179af28cba3e3
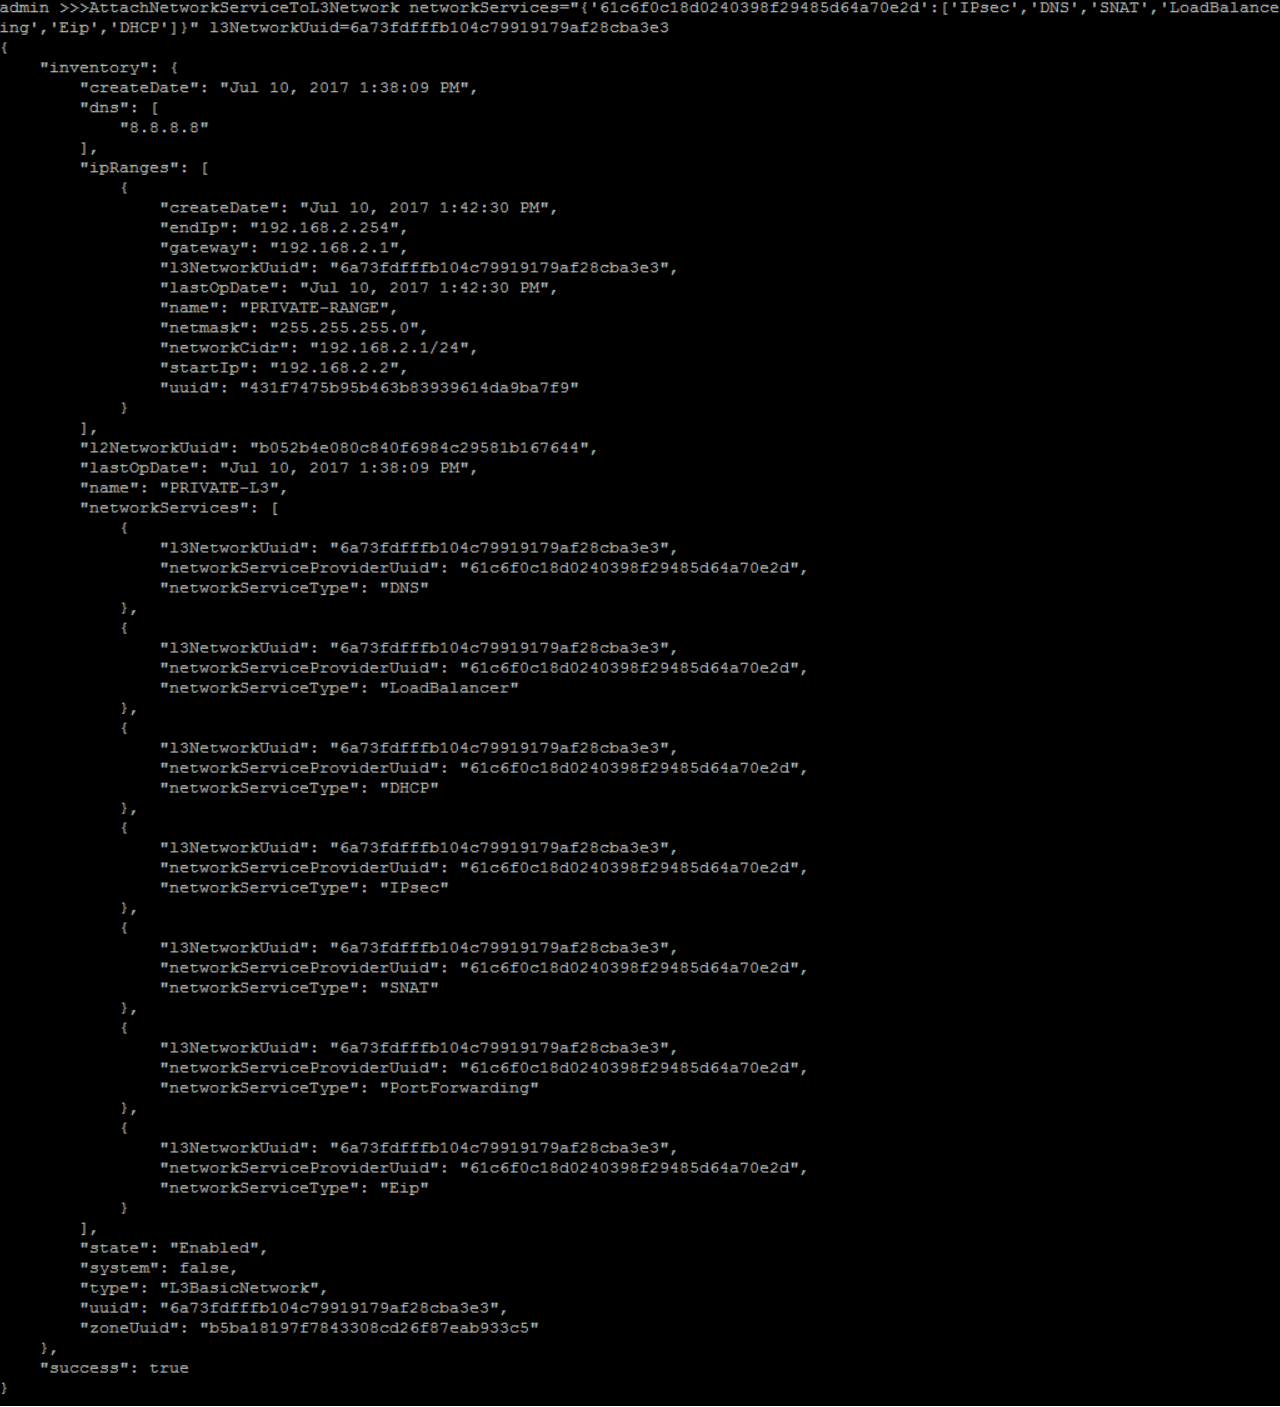
14. Create Instance Offering
create a guest VM instance offering 'small-instance' with 1 512Mhz CPU and 128MB memory:
>>> CreateInstanceOffering name=small-instance memorySize=134217728 cpuNum=1

16. Create Virtual Machine
create a new guest VM instance with configuration:
- instance offering 'small-instance'
- image 'image'
- L3 network 'PRIVATE-L3'
- name 'VM1'
QueryInstanceOffering fields=uuid, name=small-instanceQueryImage fields=uuid, name=zs-sample-imageQueryL3Network fields=uuid, name=PRIVATE-L3>>> CreateVmInstance name=VM1 instanceOfferingUuid=ce994286008d41f6be75e0f804bce47c imageUuid=6874474809df4d2292d3503884e0096e l3NetworkUuids=6a73fdfffb104c79919179af28cba3e3
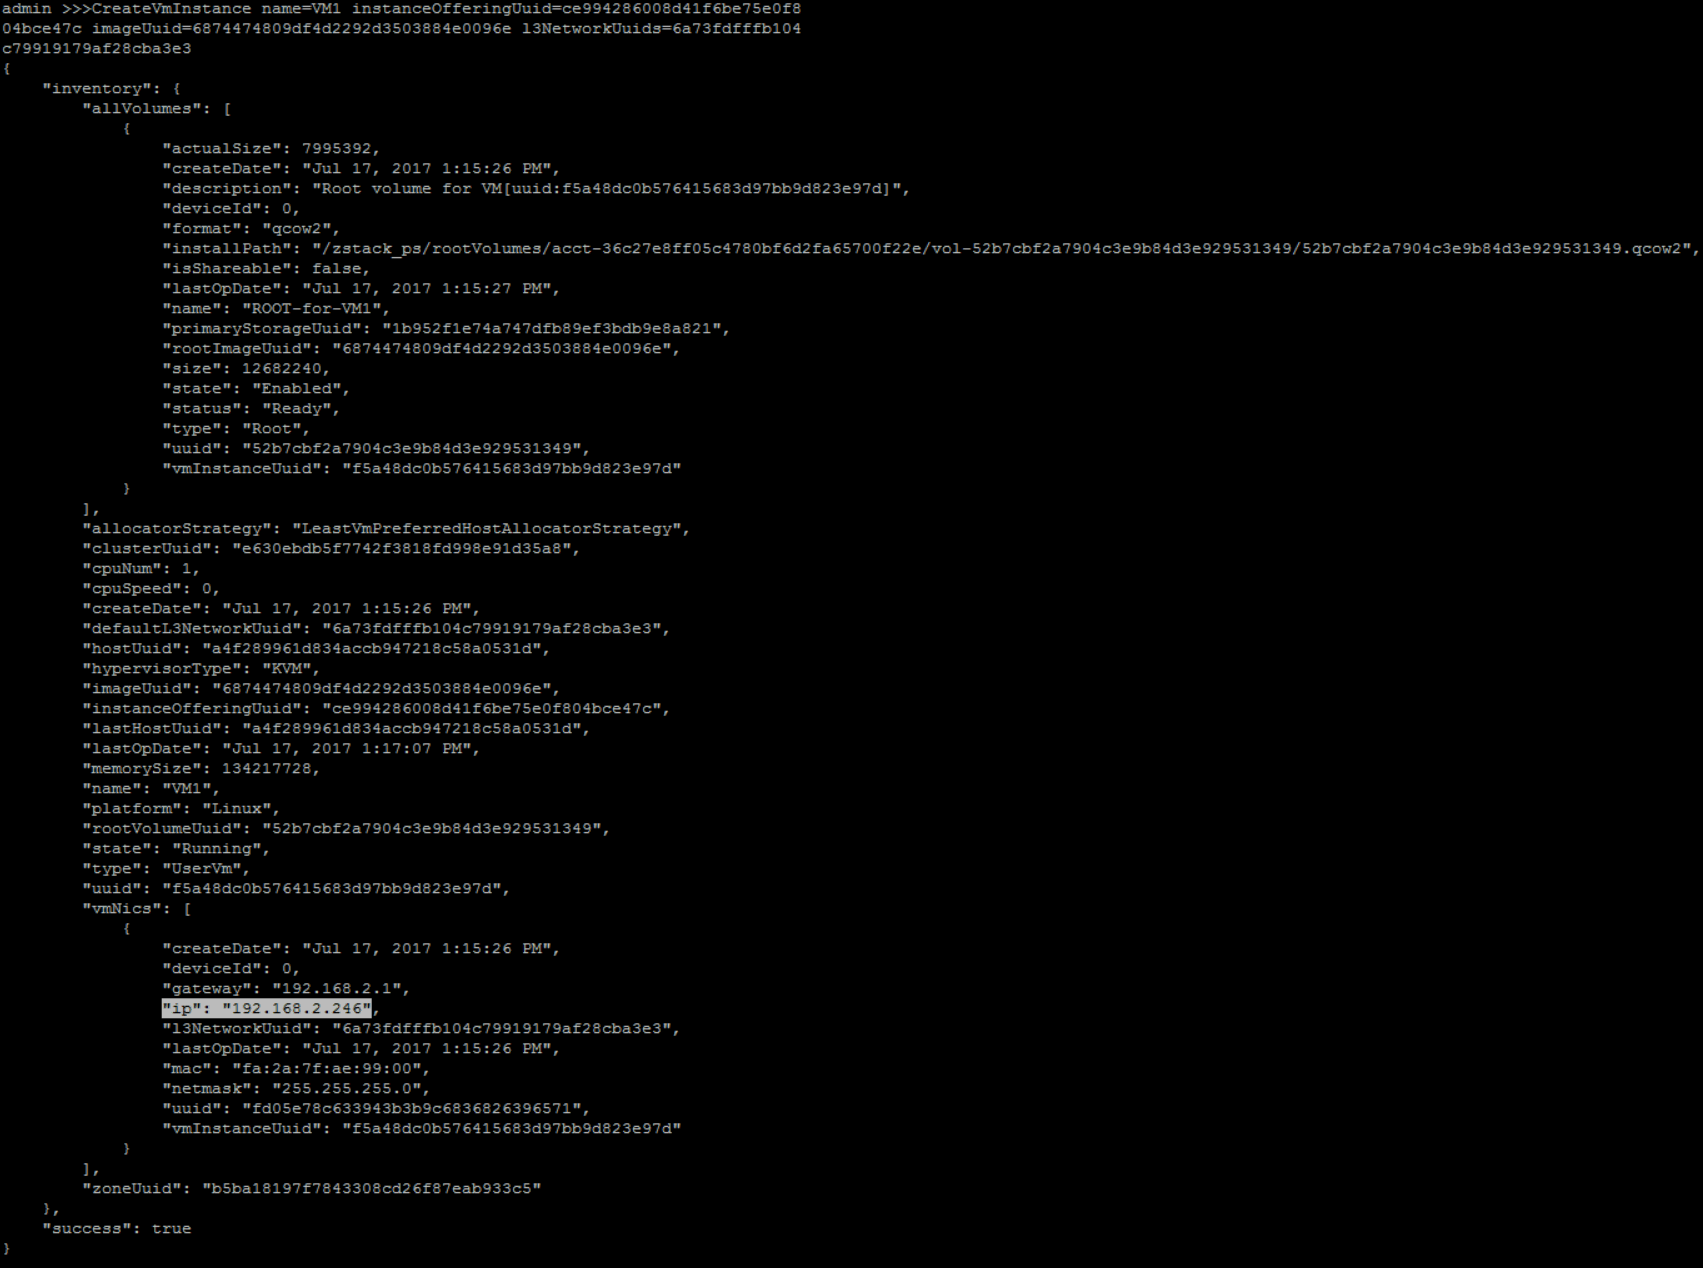
the new VM has 1 NIC ('585bb3322f444f2296eb12f3f06e4f89') and assigned IP address: 192.168.2.246
The first user VM takes more time to create
For the first user VM, ZStack needs to download the image from the backup storage to the primary storage and create a virtual router VM on the private L3 network, so it takes about 1 ~ 2 minutes to finish.17. Create VIP
create a new VIP 'VIP1' on 'PUBLIC-MANAGEMENT-L3':
QueryL3Network fields=uuid, name=PUBLIC-MANAGEMENT-L3>>> CreateVip name=VIP1 l3NetworkUuid=5bda71a3ebbd48a5947e325dd24665e5
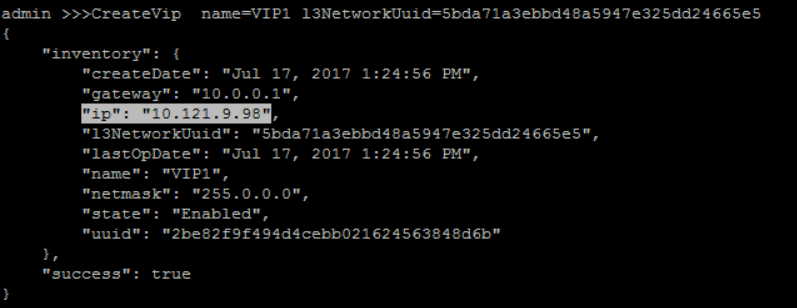
once it finishes, you should be able to see the new IP address, which will be used in Port Forwarding; in our case, the VIP is '10.121.9.98'.
18. Create Port Forwarding
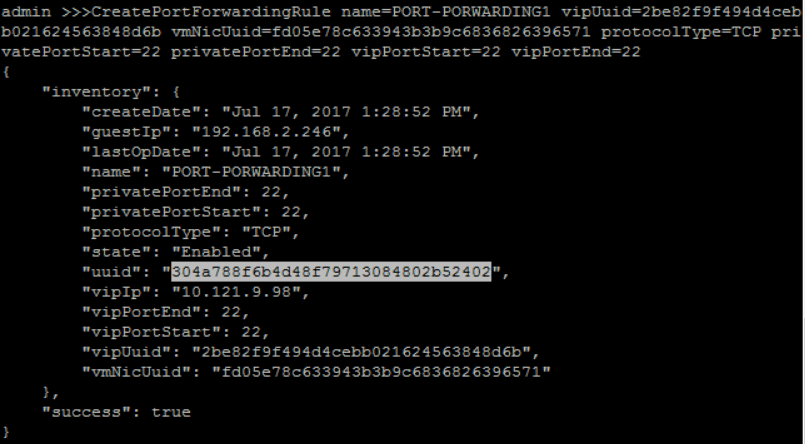
create a new Port Forwarding 'PORT-FORWARDING1' with 'VIP1' for 'VM1' NIC UUID '585bb3322f444f2296eb12f3f06e4f89' to bind VM1's 22 port with VIP1's 22 port:
QueryVip fields=uuid name=VIP1QueryVmNic fields=uuid vmInstance.name=VM1>>> CreatePortForwardingRule name=PORT-FORWARDING1 vipUuid=2bad3299657544418d1cb776cac4493b vmNicUuid=585bb3322f444f2296eb12f3f06e4f89 protocolType=TCP privatePortStart=22 privatePortEnd=22 vipPortStart=22 vipPortEnd=22
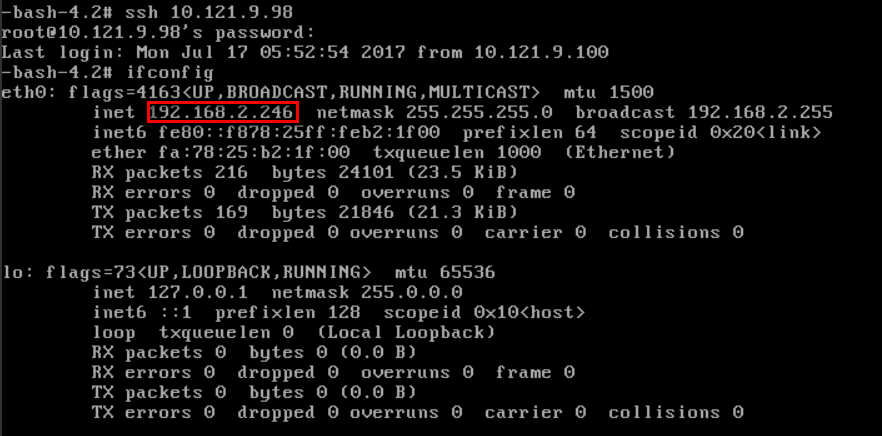
use a machine that can reach subnet 10.0.101.0/24 to SSH the IP '10.121.9.98', you should be able to login the VM and see its internal IP address:
QueryVip fields=ip portForwarding.vipPortStart=22# ssh 10.121.9.98
19. Rebind The Port Forwarding To Another VM
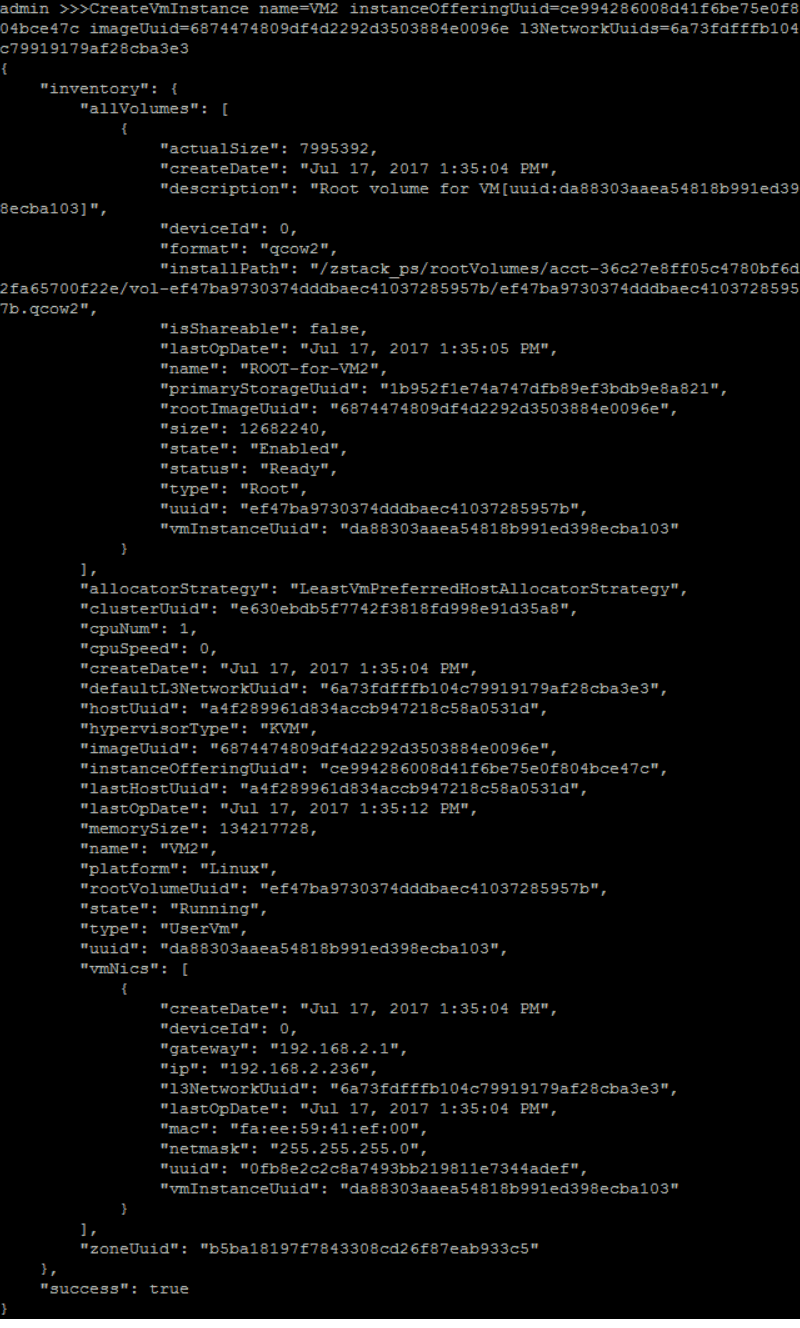
follow instructions in section 16. Create Virtual Machine to create another VM(VM2) on the private L3 network:
QueryInstanceOffering fields=uuid, name=small-instanceQueryImage fields=uuid, name=zs-sample-imageQueryL3Network fields=uuid, name=PRIVATE-L3>>> CreateVmInstance name=VM2 instanceOfferingUuid=ce994286008d41f6be75e0f804bce47c imageUuid=6874474809df4d2292d3503884e0096e l3NetworkUuids=6a73fdfffb104c79919179af28cba3e3
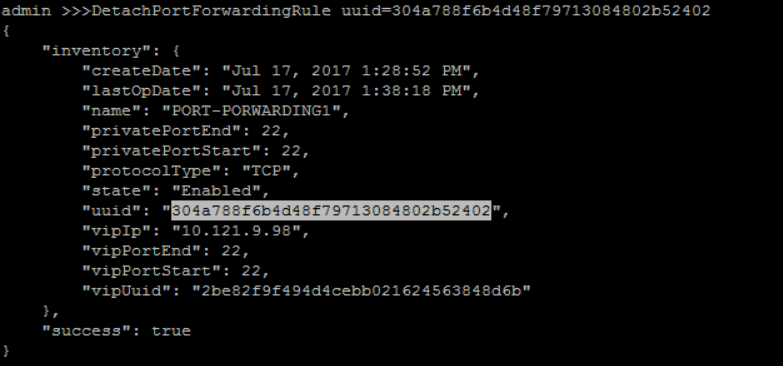
then detach 'PORT-FORWARDING1':
QueryPortForwardingRule fields=uuid name=PORT-FORWARDING1>>> DetachPortForwardingRule uuid=304a788f6b4d48f79713084802b52402
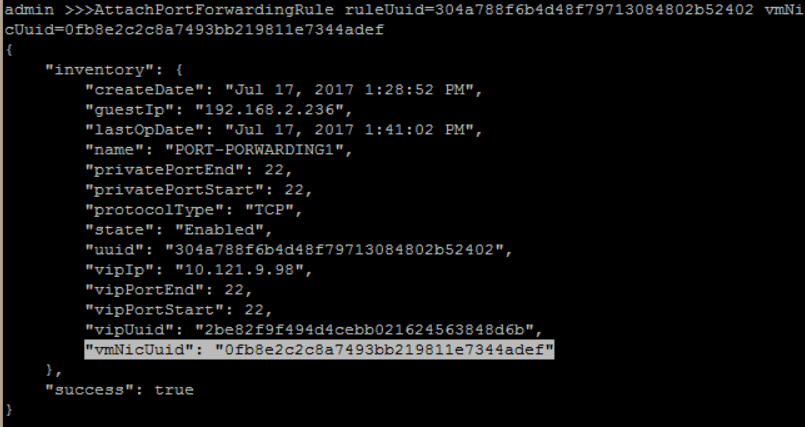
after detaching, attach the 'PORT-FORWARDING1' to VM2 NIC:
QueryPortForwardingRule fields=uuid name=PORT-FORWARDING1QueryVmNic fields=uuid vmInstance.name=VM2>>> AttachPortForwardingRule ruleUuid=304a788f6b4d48f79713084802b52402 vmNicUuid=0fb8e2c2c8a7493bb219811e7344adef
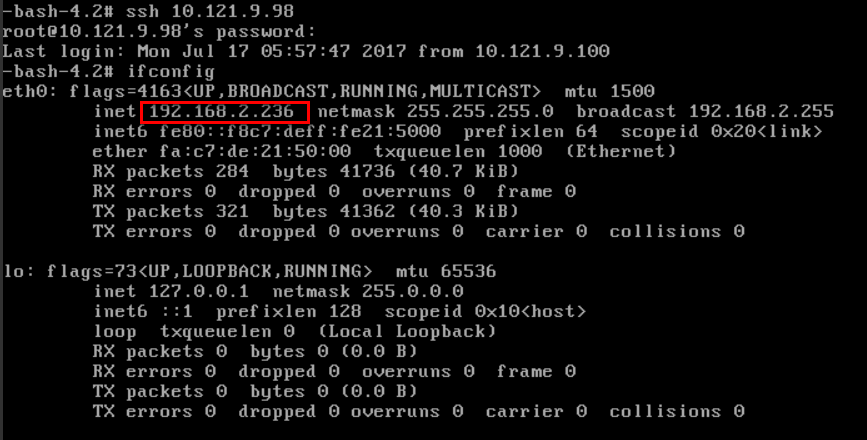
SSH login to the '10.0.101.138' again and run command 'hostname; ifconfig', you should see 'VM2' hostname internal network information:
QueryVip fields=ip portForwarding.vipPortStart=22# ssh 10.121.9.98
20. Create the 2nd Port Forwarding
create a new Port Forwarding 'PORT-FORWARDING2' with 'VIP1' for 'VM1' NIC UUID '585bb3322f444f2296eb12f3f06e4f89' to bind VM1's 22 port to VIP1's 2222 port:
QueryVip fields=uuid name=VIP1QueryVmNic fields=uuid vmInstance.name=VM1>>> CreatePortForwardingRule name=PORT-PORWARDING2 vipUuid=2be82f9f494d4cebb021624563848d6b vmNicUuid=fd05e78c633943b3b9c6836826396571 protocolType=TCP privatePortStart=22 privatePortEnd=22 vipPortStart=2222 vipPortEnd=2222
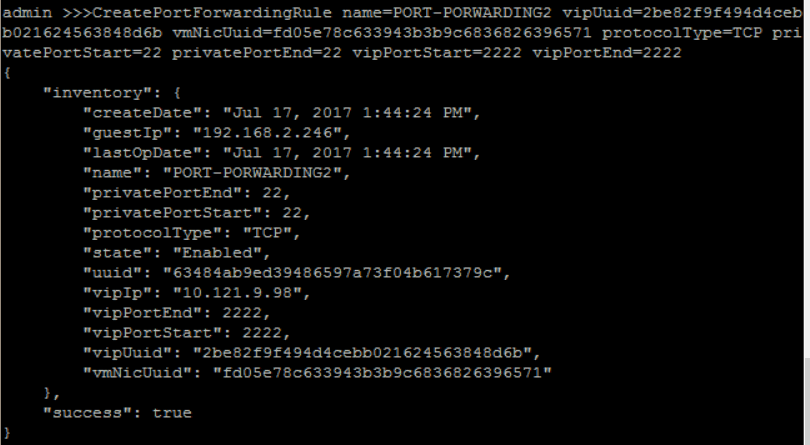
then PORT-FORWARDING1 and PORT-FORWARDING2 are sharing same VIP1 10.0.101.138 but mapping different ports to different VMs.
QueryVip fields=ip name=VIP1When ssh 22 port, it will be routed to VM2:
# ssh root@10.121.9.98

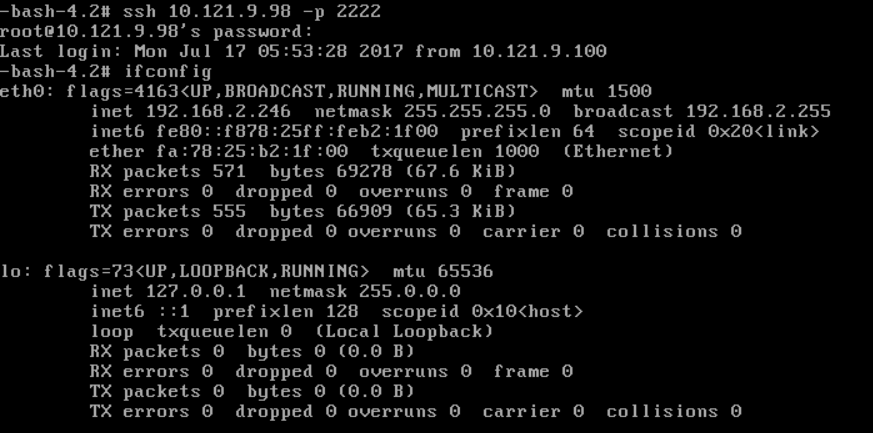
when ssh 2222 port, it will be routed to VM1:
# ssh root@10.121.9.98 -p 2222
Summary
In this tutorial, we showed you how to create port forwarding rules that allow public traffic to reach specific ports of VMs on the private L3 network. For more details, please visit Elastic Port Forwarding in user manual.